 In April of last year when the Covid-19 pandemic was still relatively new, I decided I needed a project. I certainly could have painted the bathroom, or fixed the shelving in the garage, but I wanted one that would keep me entertained.
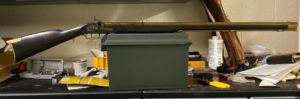
As luck would have it, sportsman’s guide was having a sale on “You Finish” style muzzle loaders. I already had a healthy supply of powder, shot, and primers between gifts and horse trades I’d previously made. For less than half the cost of a complete rifle, I had an IKEA version of a 50 caliber Kentucky long rifle.
Deciding I “needed” the black powder rifle was easy. With the early muzzleloader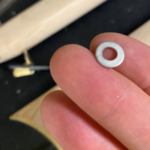 season and some special muzzleloader-only quota hunts, I knew I would have plenty of opportunities to use it. Besides, I needed to practice for the dream hunt of Sambar deer on St. Vincent island.
The Kentucky long rifle is a catch-all term for full stocked long rifles produced by primarily German settlers in Pennsylvania and Kentucky. Normally, these long flintlocks had barrels of 25 to 40 caliber, but were gradually bored out in larger caliber as the rifling wore out. Rifles of 40-plus caliber gained popularity during the westward expansion to take down buffalo and bear.
Percussion cap rifles weren’t introduced until the 1820s. So many old flintlocks were modified to use the newer faster ignition system. The “original” Old Betsy was a 40ish caliber flintlock with double set triggers in curly maple. Amazingly, this rifle survived the centuries and is on display at the Alamo museum.
If you want to build a black powder rifle, there are varying degrees of intensity. Makers like Kibler make exquisite expensive rifles and come in kits requiring a high degree of wood-working and metal-working skills. On the other end of the spectrum, Traditions makes kits that require much less knowledge and investment with about 80 percent of the build complete. These kits require some hand tool use, sanding, and finishing metal.
The kit arrived in a plastic blister pack with sparse instructions. I would recommend finding a few good YouTube videos for more clarity. This kit doesn’t come with any tools or finishing chemicals. For this build, I used an X-acto knife, mill file, and sand paper. Ok full disclosure – I lost patience at one point and brought out the orbital sander to expedite the work.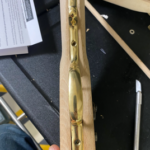
The wood requires some minor work to get the trigger and lock in place. Mine actually required some shimming with washers to pull the lock back to plumb.
The external wood required some serious removal. One of the cost-saving features of this rifle is its two-piece stock. This allows the company to use smaller blanks of wood, which reduces material and labor costs. You’ll pay for this with some extra sanding to get the two pieces of wood to fit flush.
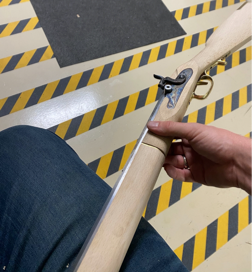
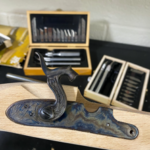
The fittings on the rifle are all brass and come straight from casting, so they have some sprue and rough spots. Don’t fret too much about your metal pieces early on since an occasional draw from a file or sander can be buffed out later.
There are a variety of ways to color or protect the barrel. In my naivety, I had thought I could use birchwood Casey “cold blue” like I had for smaller projects. The barrel was way too long for the fast-acting compound. First of all, it came out uneven. And second, it didn’t even blue or blacken. In hindsight, I could have done a second coat, but the brassy look grew on me. Itold myself many rifles of the period gained a patina over time, so my half-done job was more than fine.
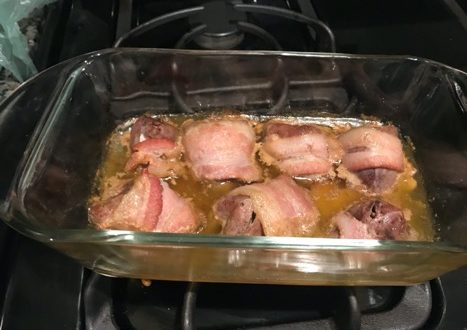
After getting the gun together, I took it to the range. With a patched ball and 50 grains of 3f, I put multiple shots into a fist-sized hole at 50 yards. Grateful to still have all my fingers, I figured she was ready for hunting. I just needed to seal her up.
For a wood finish, I chose boiled linseed oil for a traditional feel. I applied three coats and let them dry before heading out to try my first muzzle loader hunt. Three coats of oil were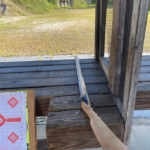 not enough.
 That entire weekend was pouring rain. Not only were three coats not enough, but I had failed to seal around the lock, trigger, or ramrod housing. The rifle swelled up like an engorged tick. It was so bad, I had to leave it next to my water heater for a week to reduce the swelling to where I could even get the ramrod out.
Then I took her apart, oiled the metal, and sanded the wood down again. This time, I sealed her with an ebony wood stain and waterproofing. This combo makes the brass pop and hides any gaps I may have left in my work.
 I’m too young to have grown up with Fes Parker but it doesn’t stop me from humming the theme song while walking in the woods. For most Florida hunters, a shorter Hawken rifle would be a better fit for the scrub or tree stand hunter. Even at its length, however, the Kentucky carried well and has that colonial America character you can’t help but enjoy.
I have not yet harvested any game with my rifle, but I hope to change that soon on some wild pigs. Until then, I’ll keep my powder dry, and I’ll see you in the field